
In windows 10 and 11, operating system provide auto update feature for virus and threat protection and there are many updates that Windows installs because they are necessary for the system’s performance like – windows defender antivirus, drivers, softwares, frameworks etc. we suggest that please download and install all updates because these updates are helpful for you, your system will run faster and stay safe from viruses, but in case if you don’t have internet or low data, then you can turn it off, because when you connect the internet, updates starts downloading automatically and all the mobile data will be used, so we can see six ways that you can stop auto update windows 10 and 11 manually let’s see…..
Six ways to stop auto update windows 10 and 11
Auto updates features will starts after windows 7 operating system, there are no need to change any settings in windows 7 or older operating system, this settings works on windows 8, windows 10 and 11, because in this versions microsoft provide auto update features to stop auto update check following steps.
First way – Using services.msc
In Windows 10 and 11, when you apply this method, service will be stop temporary or limited time period, after that service will start automatically or after restart the computer as well, follow the instructions :
1. Turn on you pc or laptop.
2. Make sure internet should be off.
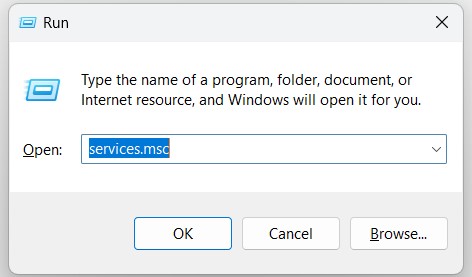
3. Press Window + R key – after pressing combination key, run tab will open.
4. Then type services.msc in search bar and press enter.
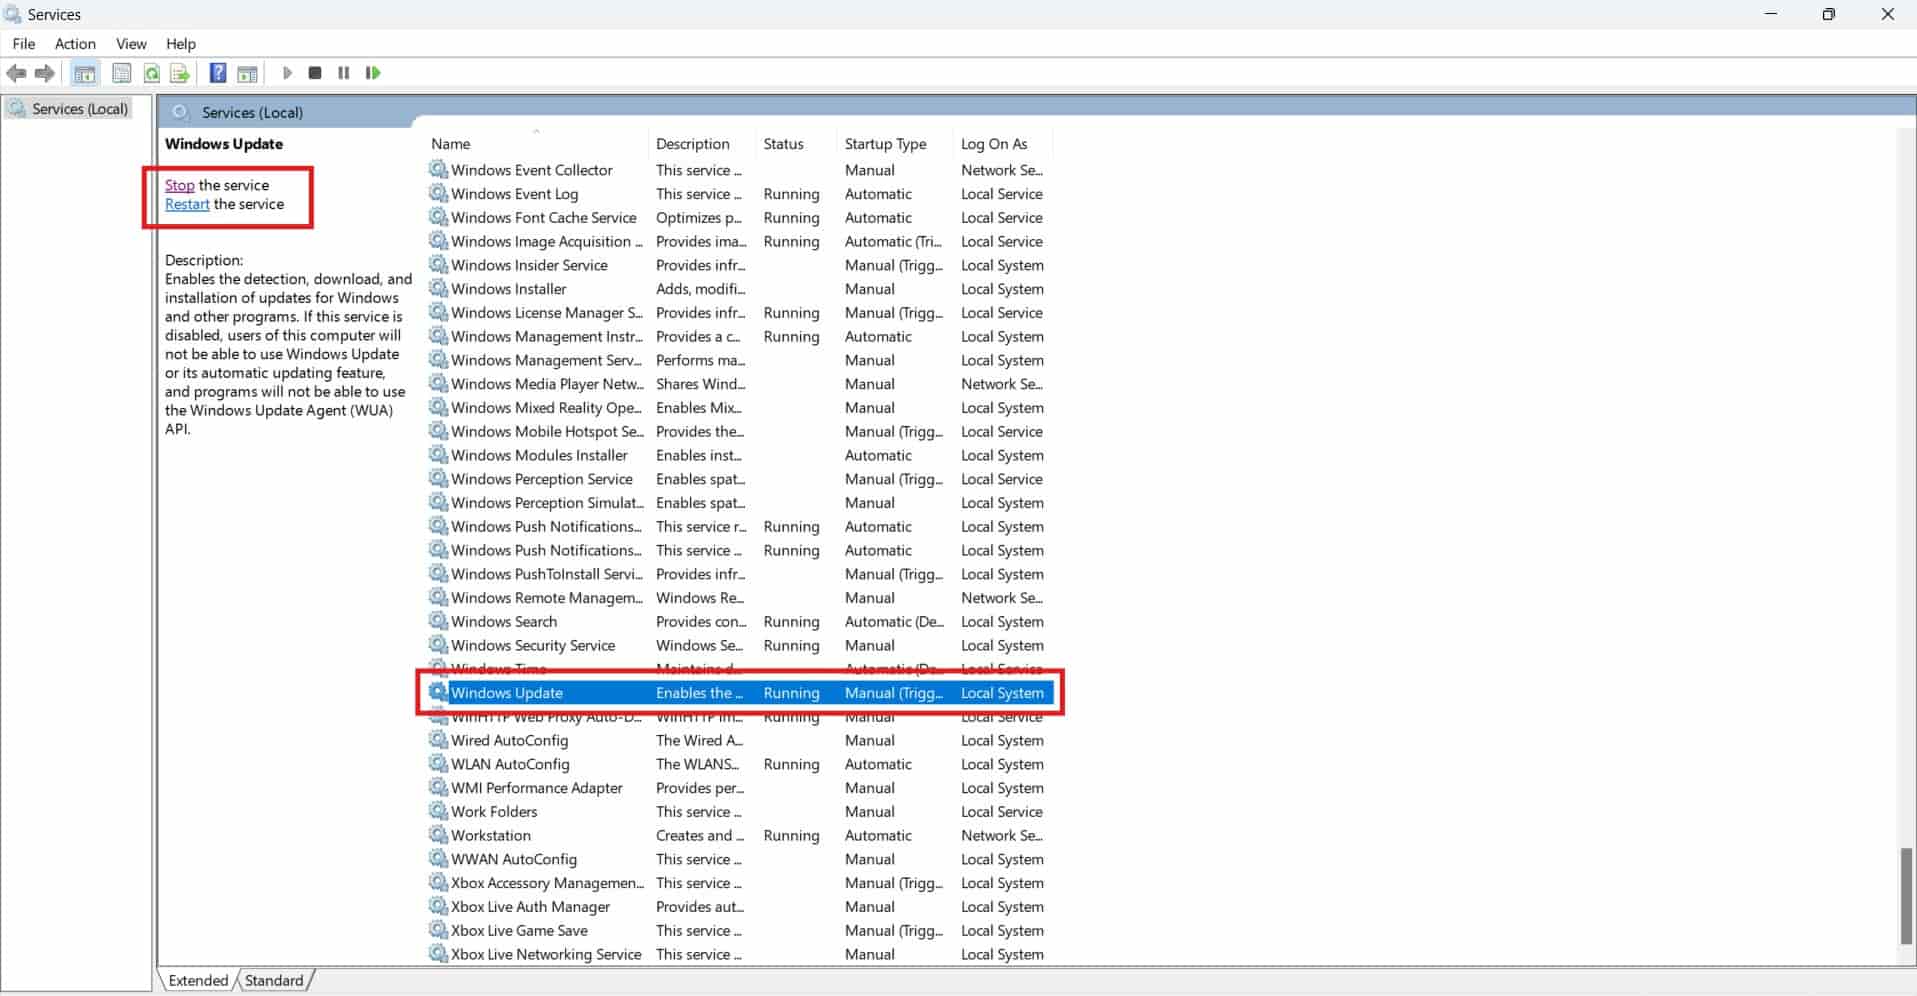
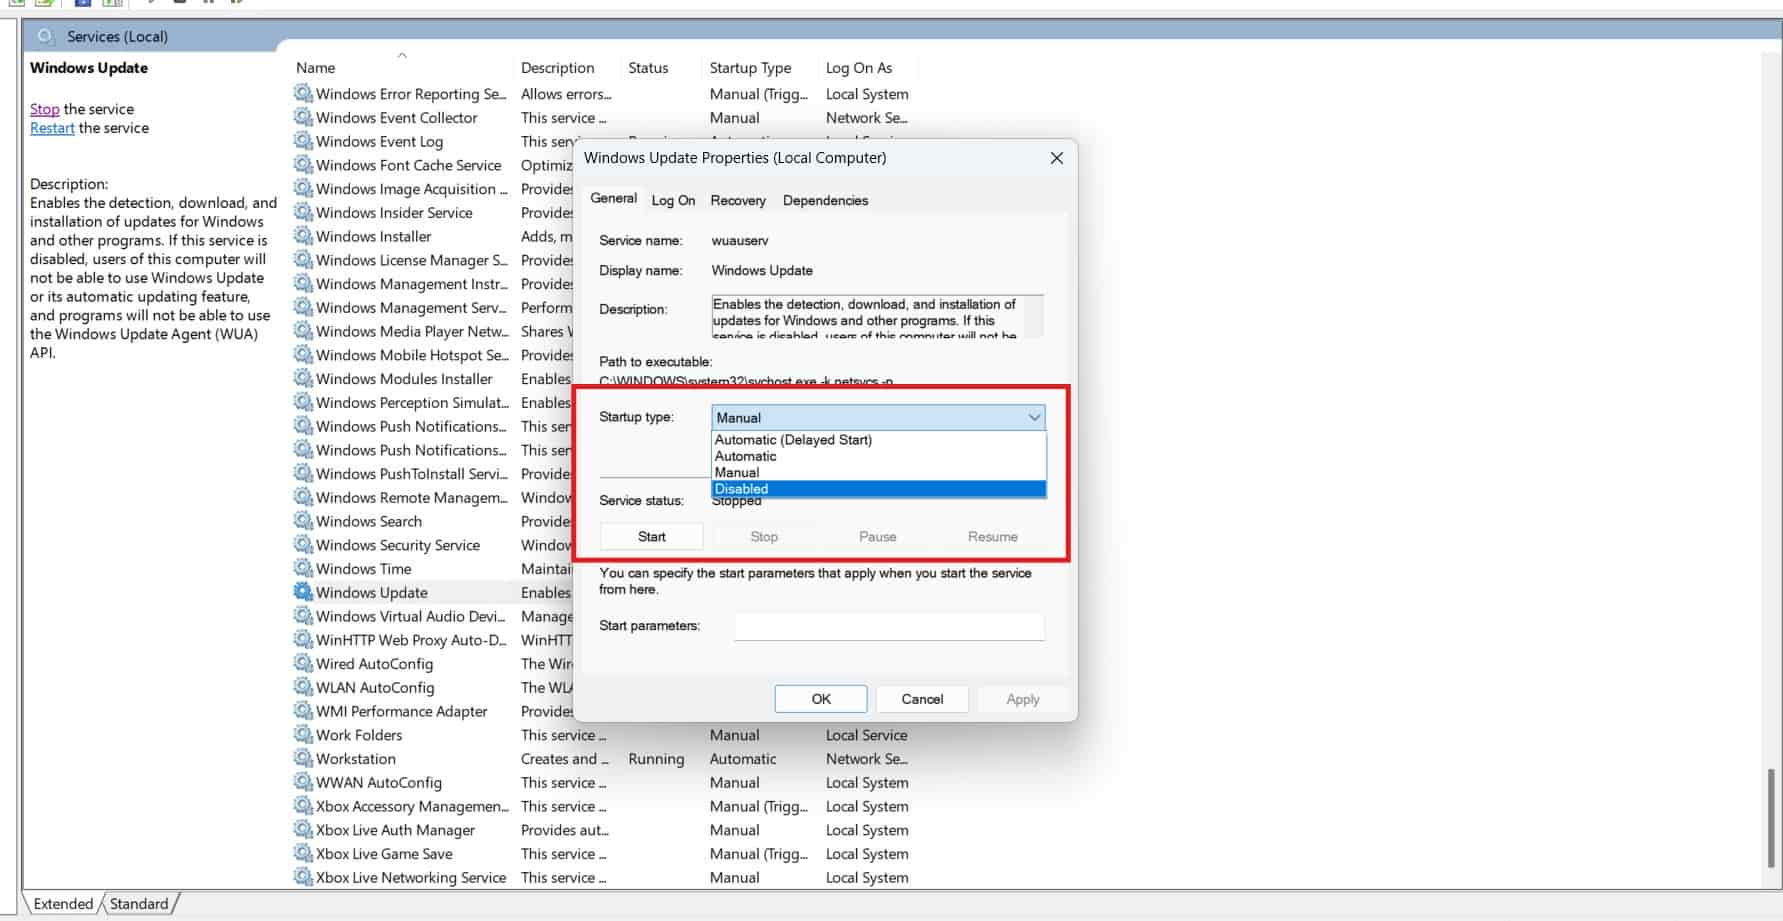
5. You will see that the services tab has been opened, scroll down and find windows update and then click on it.
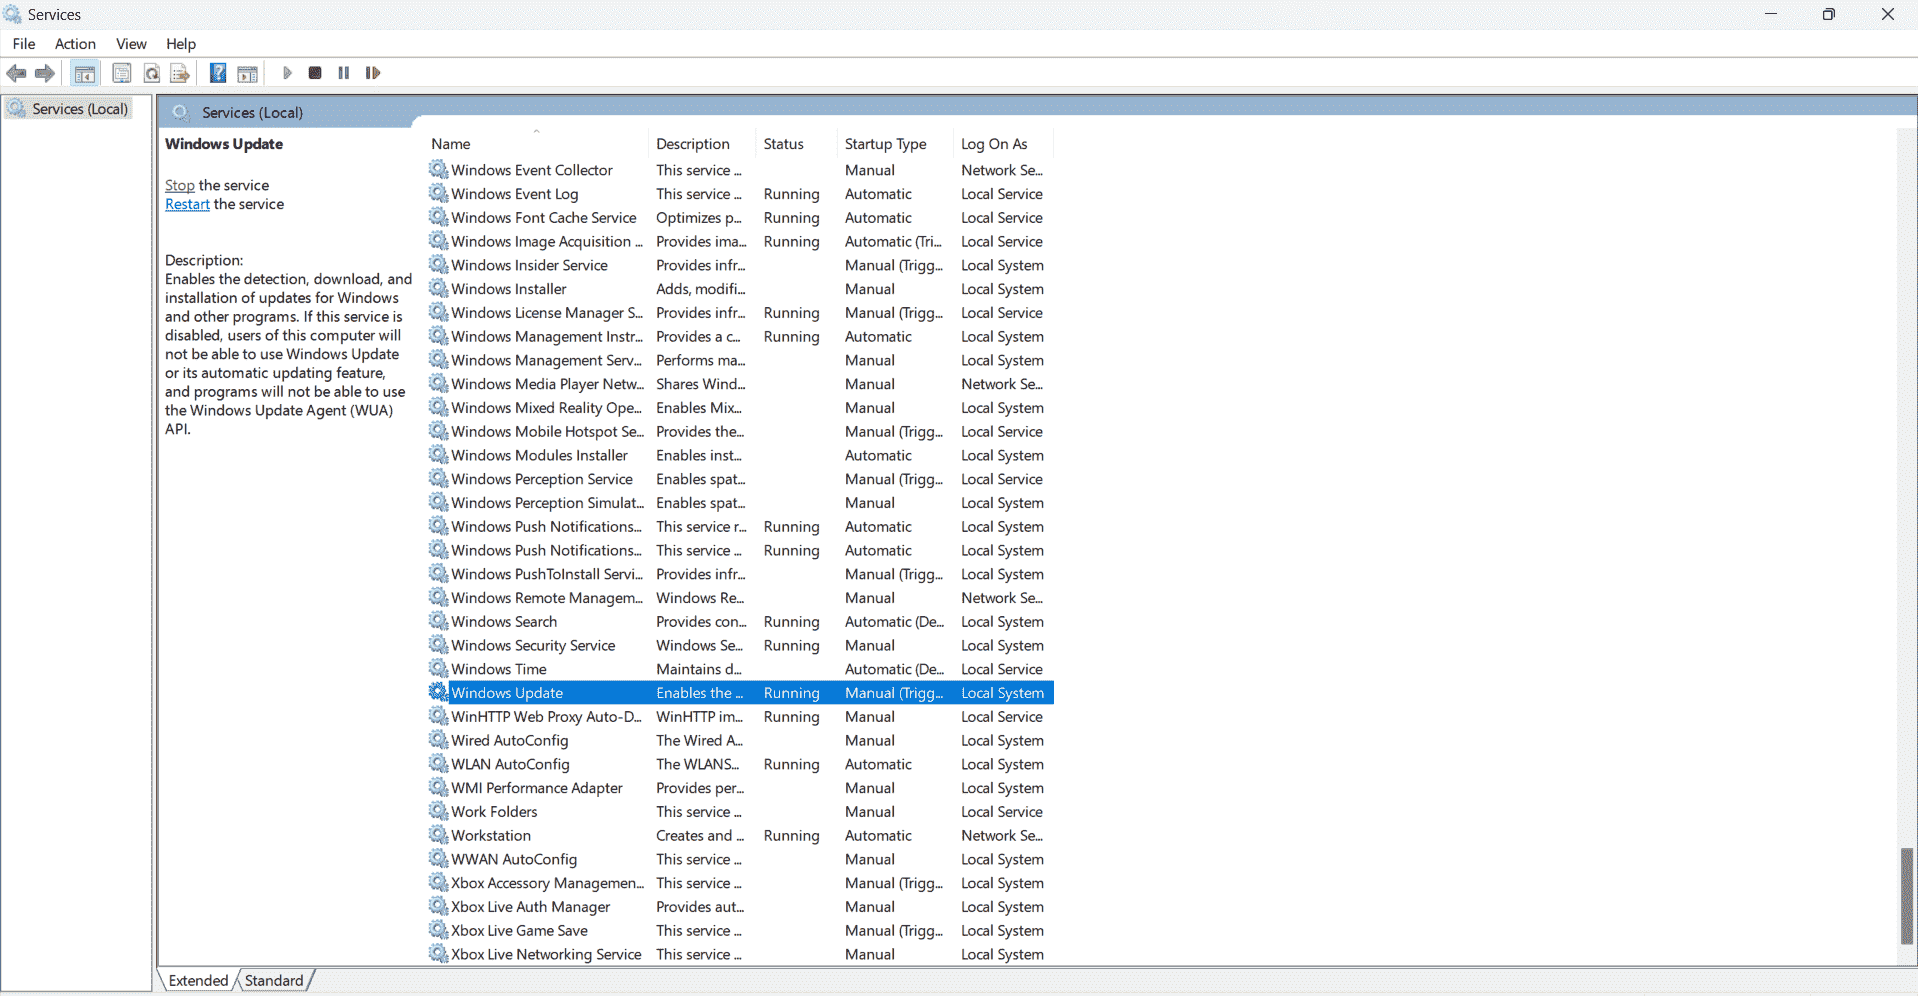
6. You will see stop the service and then restart the service in upper left slide.
7. Then Click on stop the service.
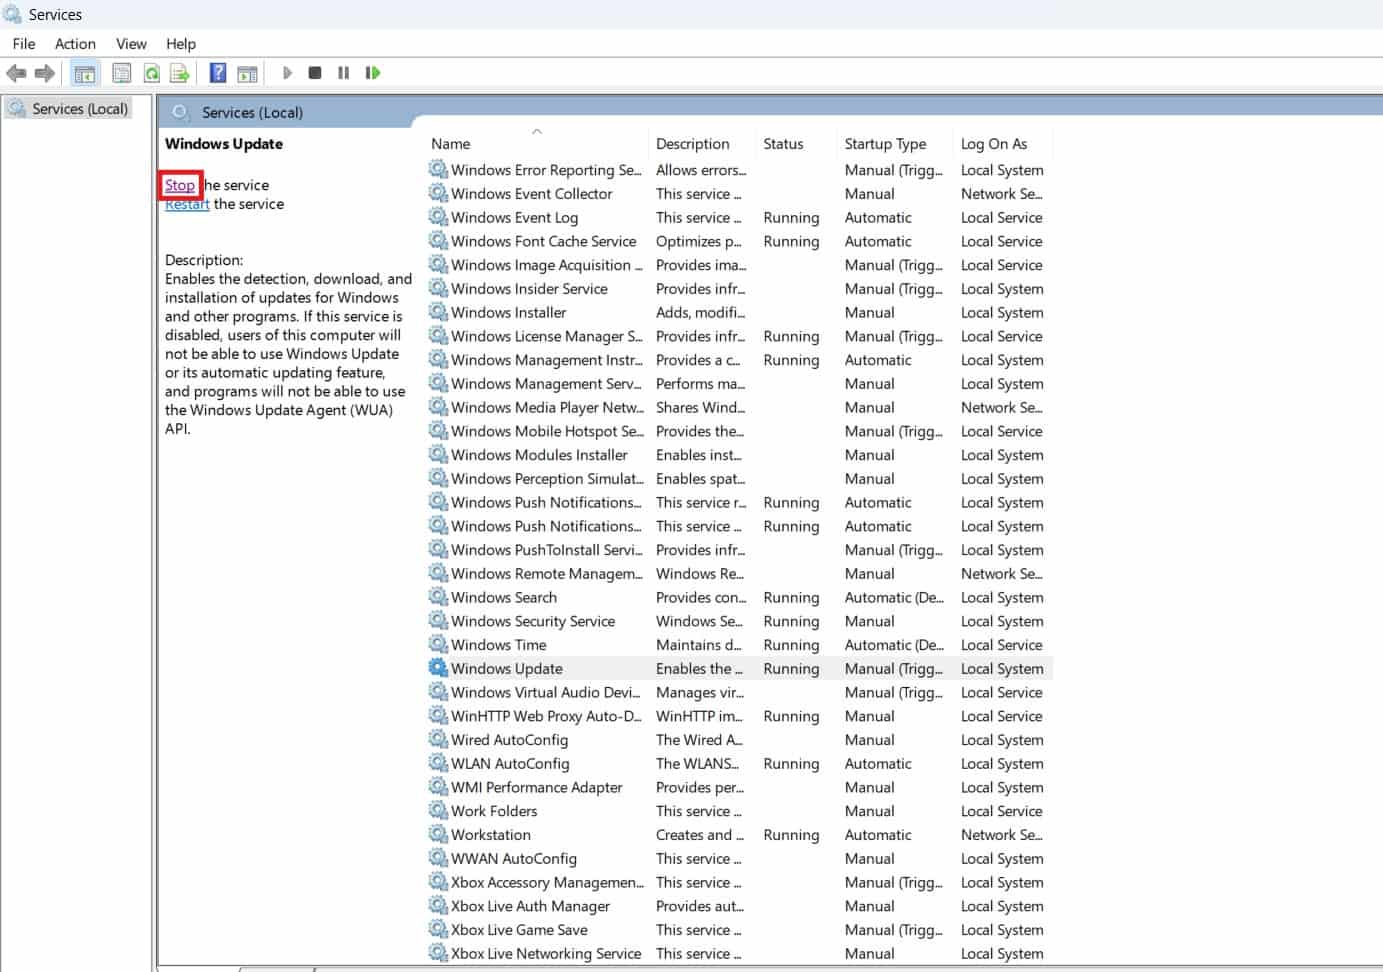
8. Then double tap on windows update or right click on windows update then click on properties.
9. You will see properties tab, in startup type, select disabled then apply and ok to save changes.
After applying this method update windows 10 and 11 services will be stopped, then you can connect the internet on computer, or if service start again before restart the computer then apply same process and some time when you restart the computer, it may start again or it may not be start again, if you want to start again then apply same process and start the service.
Second way – Using registry editor ( Advance )
This method is a risky to stop update windows 10 and 11 so be careful, because when you open registry many files and folder are open this file is very important for running the system specially in windows 10 and 11 if any important file are deleted accidentally it can damage to your operating system, so apply this method correctly and carefully.
1. Press the windows key + R key to open the Run command.
2. Type regedit and press enter, then allow permission to open registry editor.
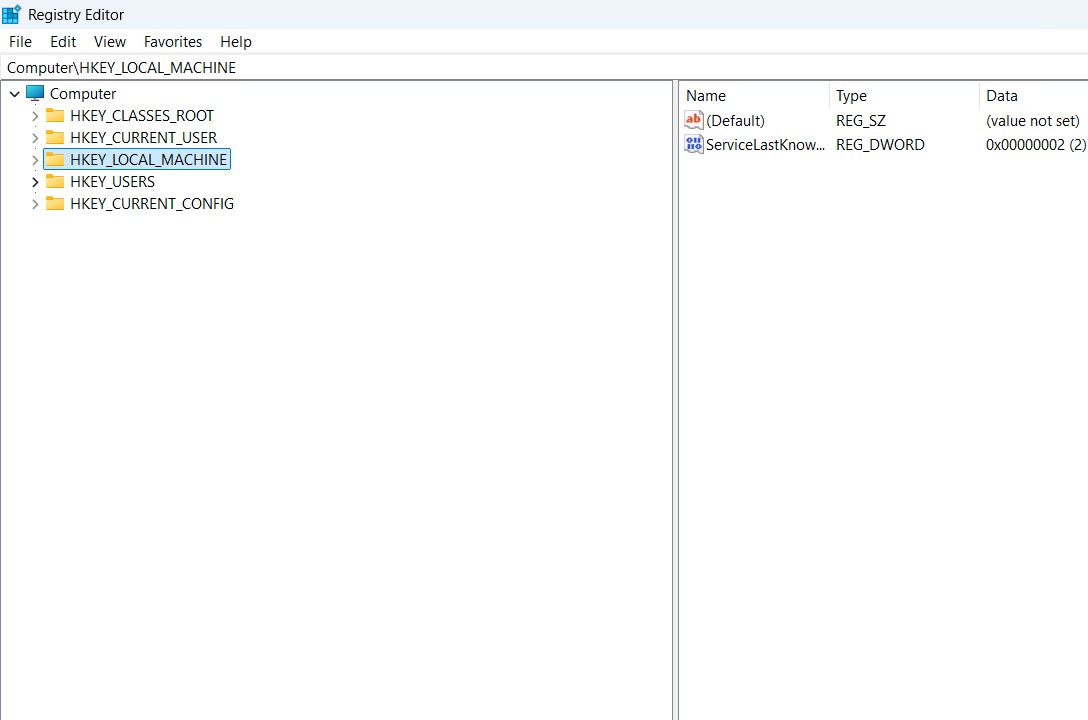
3. Then navigate the – HKEY_LOCAL_MACHINE/SOFTWARE/Policies/Microsoft/Windows
4. Right click on windows and select new then click on key.
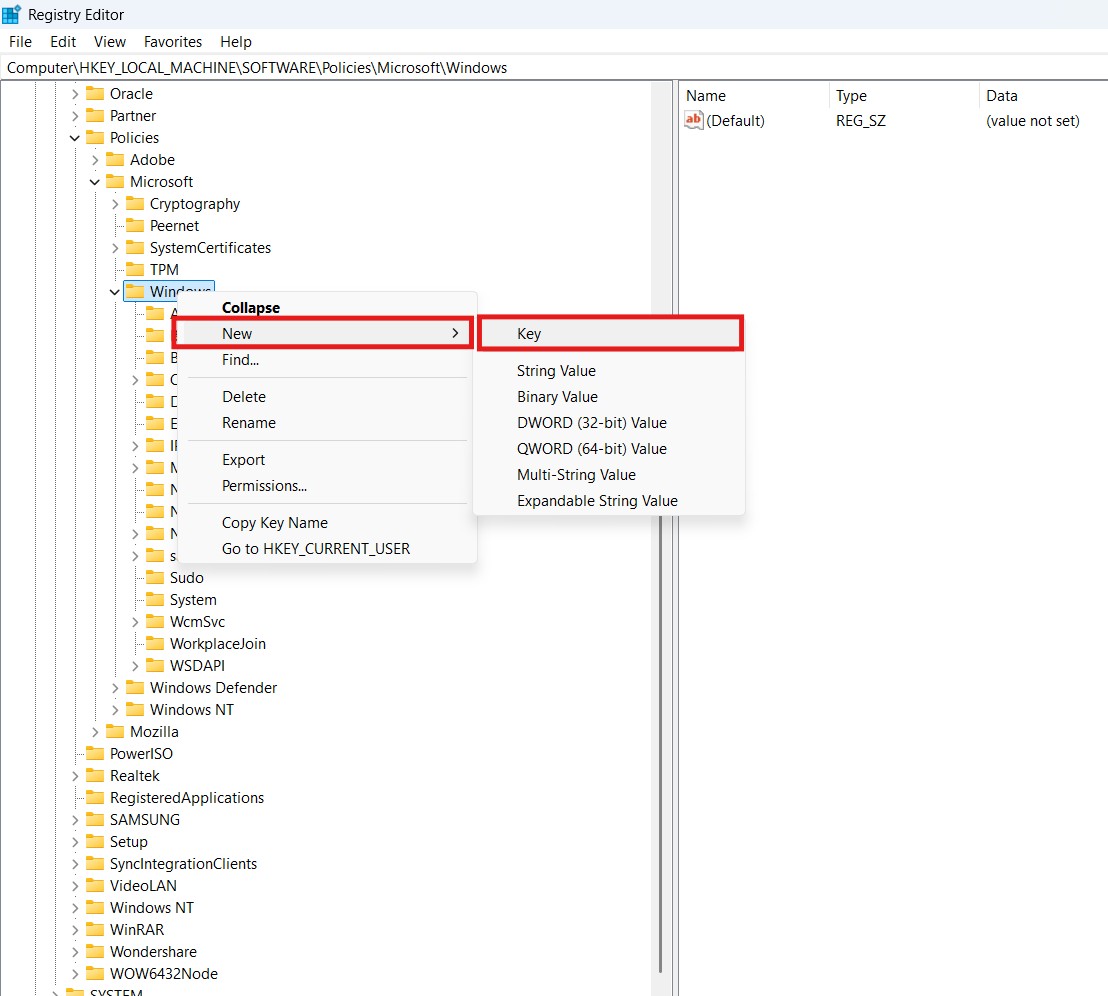
5. After that, new folder creates in windows key rename as WindowsUpdate and then press enter.
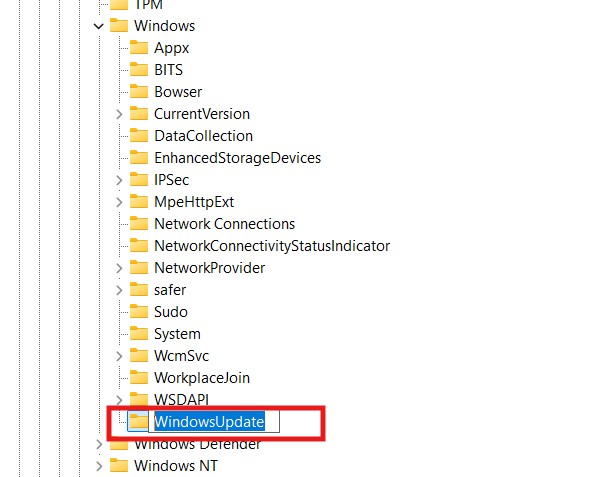
6. Then right click on WindowsUpdate and select new then click on key.
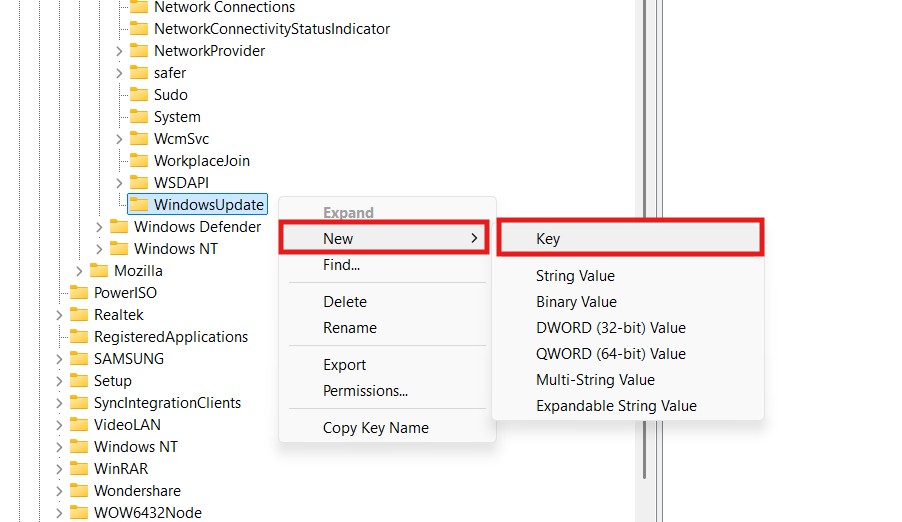
7. After that, new folder creates under WindowsUpdate and rename as AU and press enter.
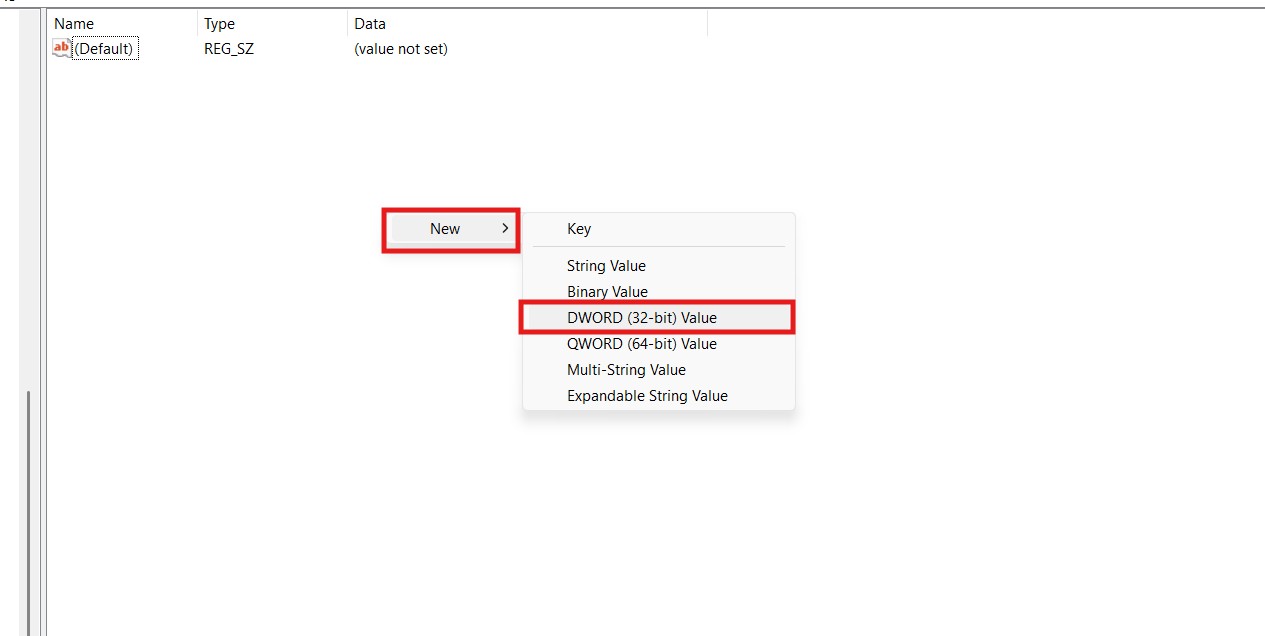
8. Then double click on AU and In right side, right click and select new then click on DWORD (32-bit) Value.
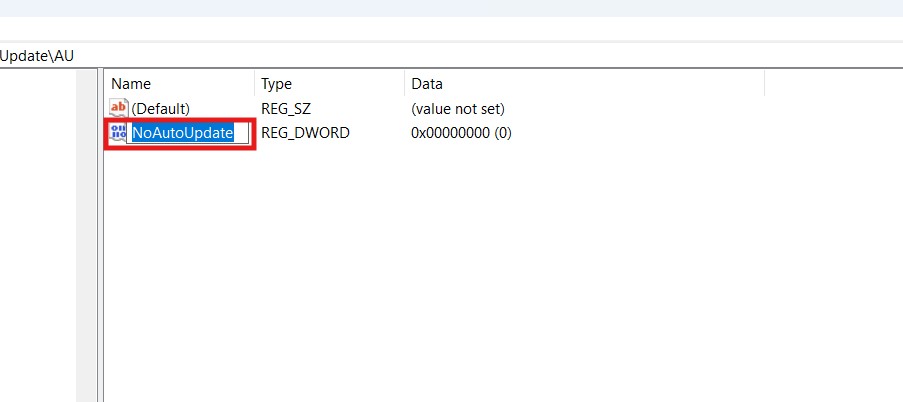
9. New file creates and then rename as NoAutoUpdate and press enter.
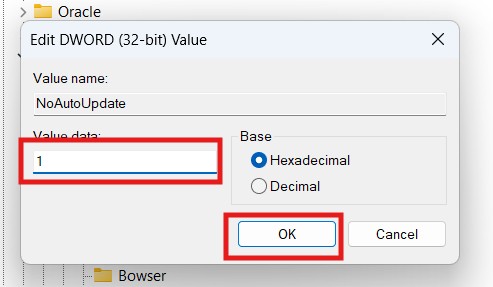
10. Then Double click on NoAutoUpdate, new tab will be opened.
11. Change value to 1 and then click ok.
This method is used for permanently stop auto update windows 10 and 11, but we suggest that stay away from this method this is risky and if you are beginner and you don’t have a much knowledge of computer then don’t apply this method, and if you want to apply then backup your important files.
Third way – Using Group Policy Editor ( Advance )
1. Press win + R key and type gpedit.msc and then press enter.
2. Then navigate the path – Computer Configuration/Administrative Templates/Windows Components/Windows Update
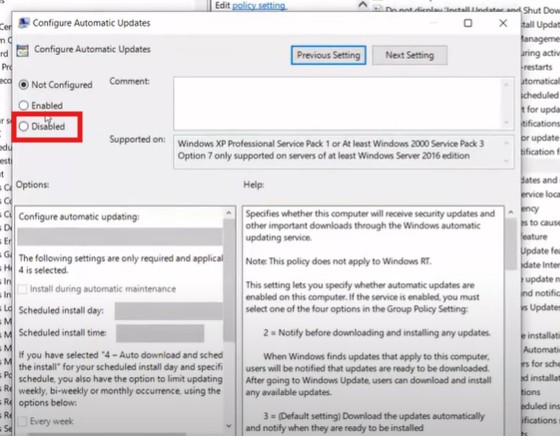
3. After that click on Windows Update, In right side scroll down and find Configure Automatic Updates then double click on it.

4. Then click on disabled and then apply and ok.
And in this method of group policy editor there are also one more way for windows 10.
1. Press win + R key and type gpedit.msc and then press enter.
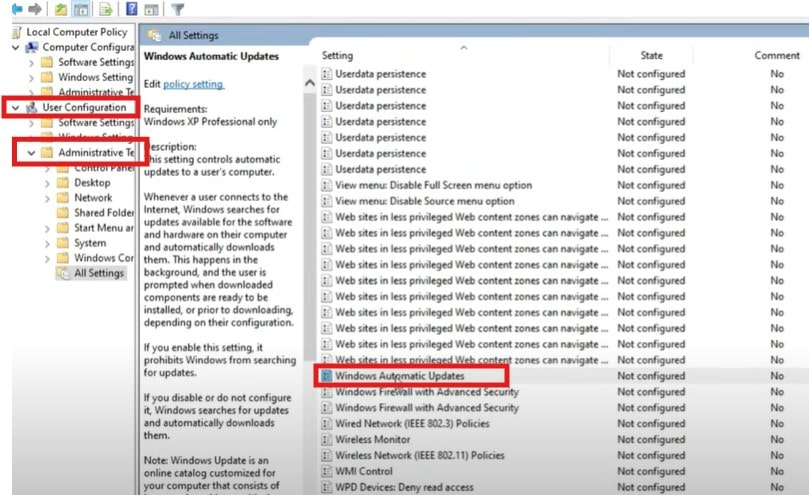
2. User Configuration/Administrative Templates/All settings then double click on it.
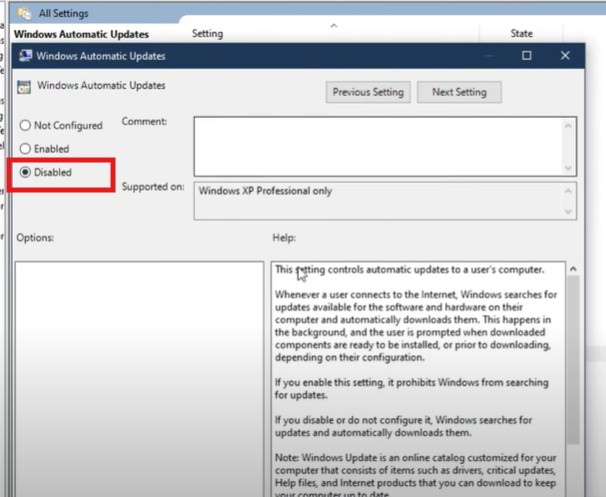
3. After click on All settings, In right side scroll down and find Windows Automatic Updates then double click on it.
4. Then click on disabled and then apply and ok.
This method is also effective but sometime when you restart the computer it will enable automatically.
Fourth way – Using Settings
This method for stop auto update windows 10 and 11 is different for every operating system because every edition of operating system have different settings interface, but path will same around in all type of edition.
Start with windows 11 –
1. Go to settings.
2. Then Click on windows updates.
3. After that pause update for one week, two week or three week.
for windows 10 or 8 –
1. Open settings.
2. Then Click on update and security.
3. After that Click on advance option.
4. Turn off all options and pause update till selected date.
This method is not effective because microsoft not allow for stop the update if you pause the update, still it get enable automatically and when you starting the computer, if update will starts after connecting the internet then you pause the update it doesn’t works the update will still continue running.
:- Check Top 5 domain purchasing sites
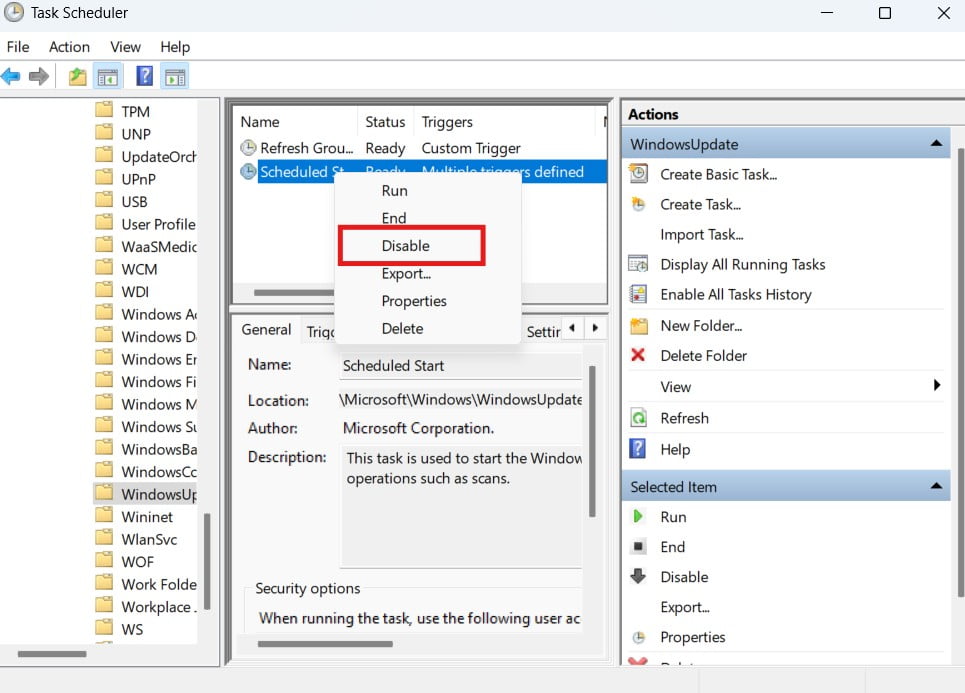
Fifth way – Using Task Scheduler
This method is effective and easy for windows 10.
1. Search task scheduler in window search bar and then open it.
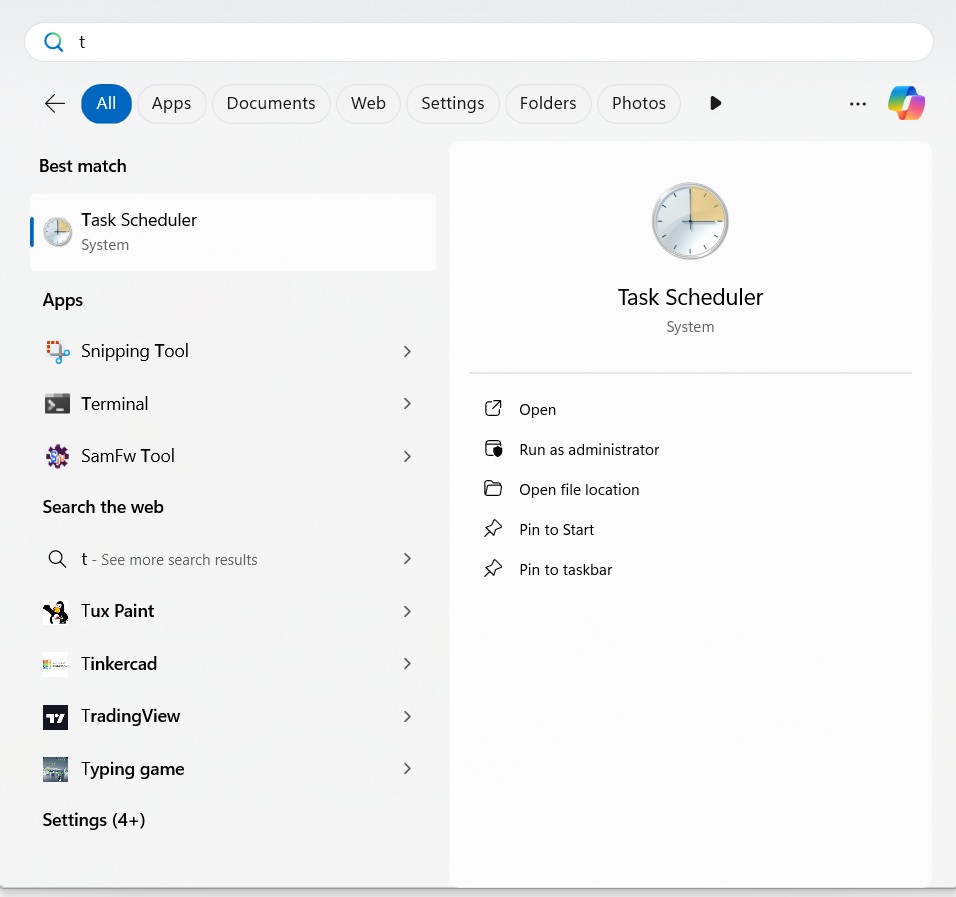
2. Then Navigate the path – Task scheduler library/microsoft/windows/windows update – double click on it.
3. In right side right click on scheduled start and then click on disable.
Sixth way – Using Meter Network Connection
1. Open settings.
2. Then Click on network and internets.
3. After that Click on wifi.
4. Select connected wifi and then set as meter connection.

This method works only to save the mobile data, It doesn’t allow using too much mobile data and you can also set a limit on how much mobile data you want to use, but this method is not effective in windows 10 and windows 11.
So this is a complete detail information of How to stop auto update windows 10 and 11, if this information is informative for you, please comment and keep checking the website. you will get such informative article in the future.
Very nice excellent