
When your laptop or PC becomes slower, one of the primary reasons might be the Random Access Memory (RAM) of your system. RAM is a vital component of your computer that makes it work efficiently by helping it process information faster. With the passage of time and installing more software or running several programs, your system may lose speed. So, understanding how to check RAM in laptop or PC will assist you in detecting any problems and knowing if an upgrade is required. In this tutorial, we will guide you through various ways to check your system’s RAM for both Windows and Mac computers.
What is RAM?
It is essential to learn about what RAM is prior to knowing the details of how to check RAM in your laptop or PC. RAM, or Random Access Memory, is temporary storage that enables your system to access the data it is currently using quickly. Your hard drive is slower but has a larger capacity compared to RAM. The more RAM your system has, the more programs it can run at once without any problems. When you run out of RAM, your system begins to slow down, as it will start to utilize your hard drive as virtual memory.
Why Check Your RAM?
Knowing how to check RAM in laptop or PC. If your computer is slowing down, it might be because of low RAM. If you are attempting to upgrade your computer, you’ll want to know how much RAM it has at present. Furthermore, checking your RAM can allow you to track your system’s health and performance. If your computer is operating slower than it should, checking your RAM is a part of the first troubleshooting steps.
How to Check RAM in Laptop or PC (Windows Users)
For everyone who uses Windows, it’s easy and fast to check your RAM. If you’re trying to troubleshoot or are preparing to upgrade, so these steps will give you all the information you require.
1. Using the Task Manager
The easiest way to see your RAM is to use the Task Manager. Here’s how you can do it:
a). Press Ctrl + Shift + Esc on your keyboard to open the Task Manager.
(Also use search option by pressing win key and one method more is right click on taskbar and then click on task manager)
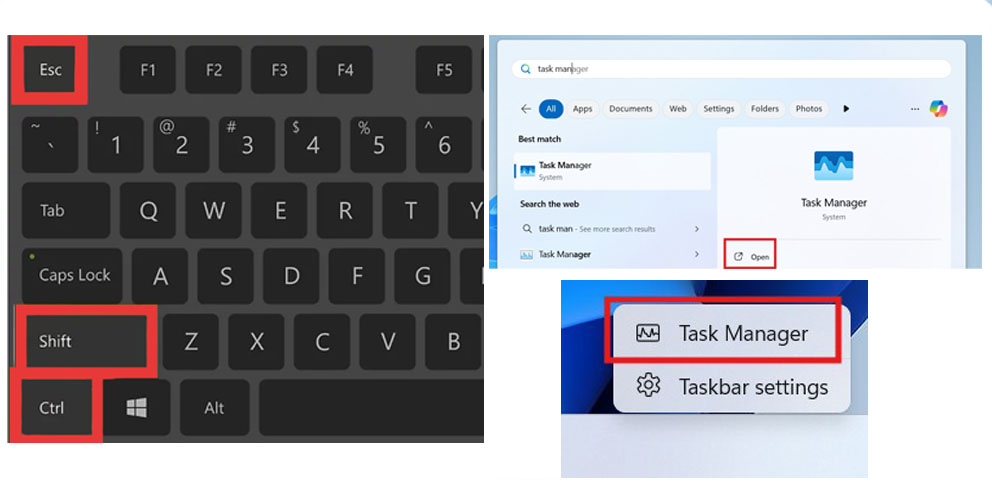
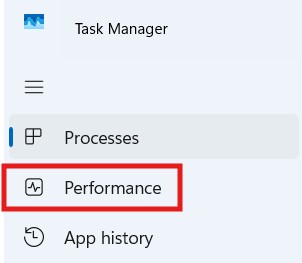
b). Then go to the Performance tab.
c). On the left side, click on Memory. Then you’ll see the total amount of RAM installed, along with other details like the speed, number of slots used, and available memory.
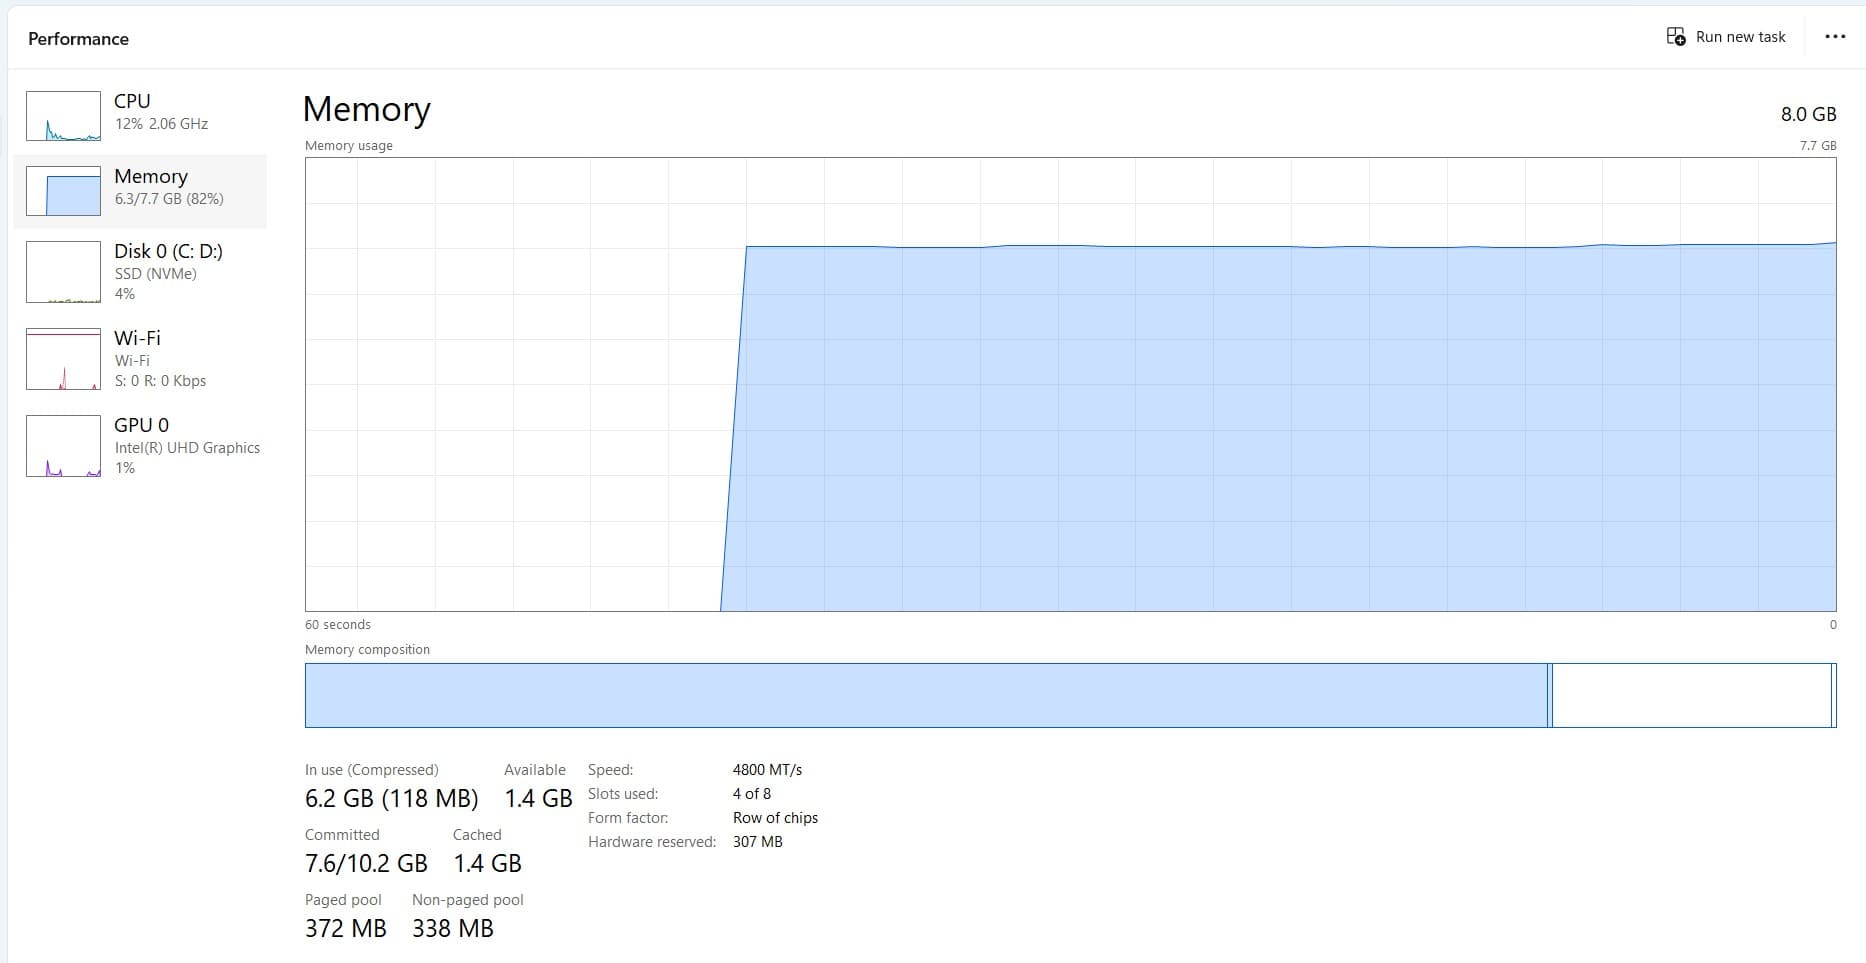
This method is fast and effective for getting a snapshot of your RAM’s current usage and status.
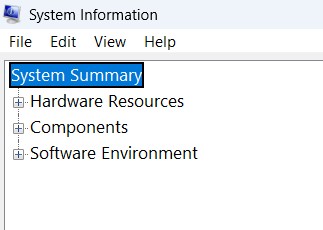
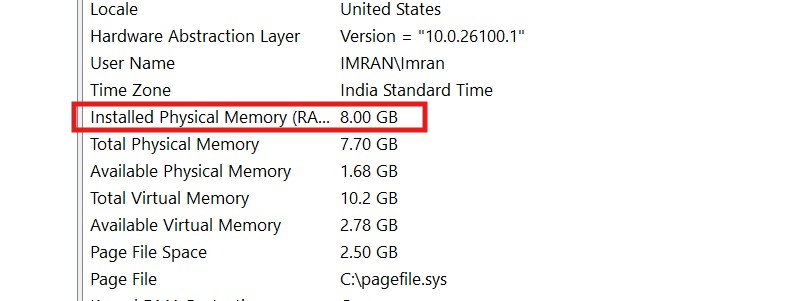
2. Using the System Information Tool
Another method to verify your RAM in Windows is by using the System Information utility. Here are the steps:
a). Press Windows Key + R to open the Run dialog box.
b). Then type **msinfo32** and press Enter.
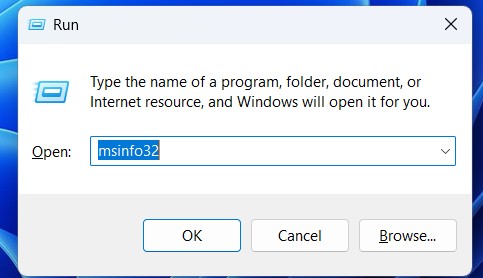
c). The System Information window will appear. In the System Summary section, find Installed Physical Memory (RAM). This will indicate the total RAM installed on your computer.
This is also an easy method if you’d like more in-depth information regarding your hardware on your system.
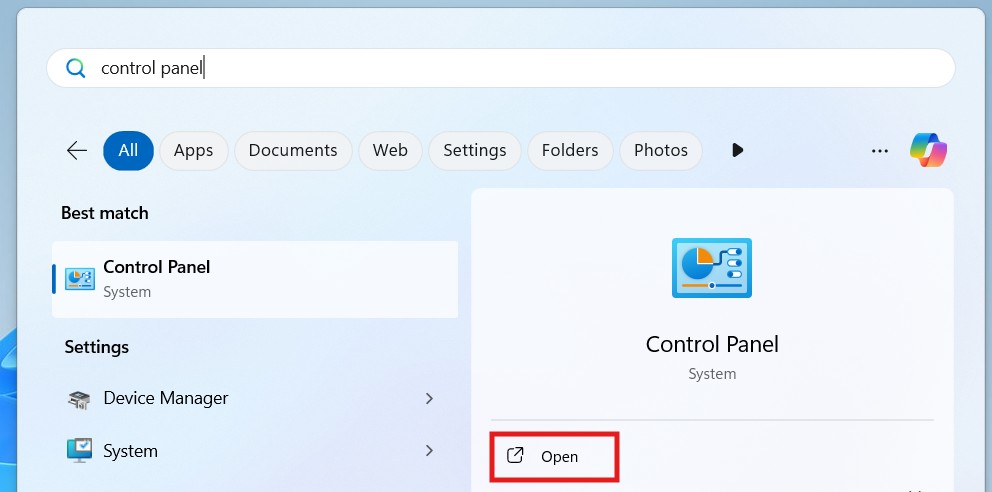
3. Using Control Panel How to Check Ram in Laptop
a). Press the Windows key and then enter Control Panel in the search bar. Hit Enter to open it.
b). Then click on System and Security.
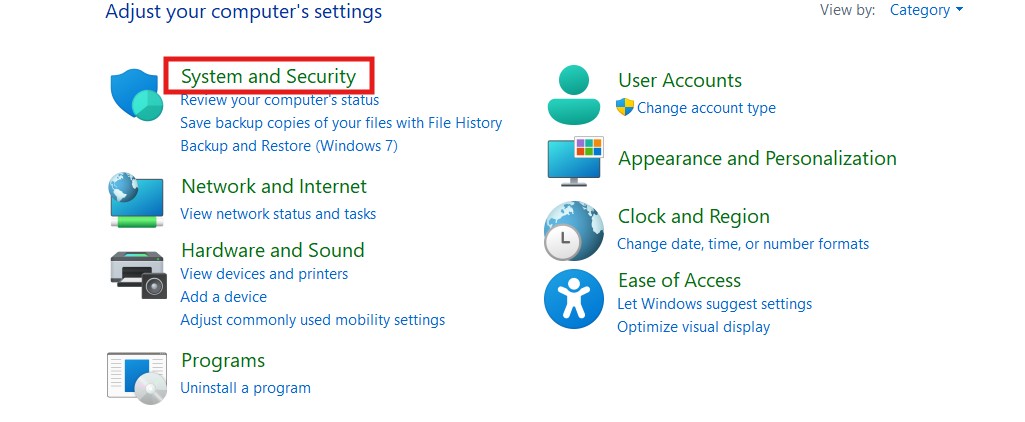
c). Then click on System.
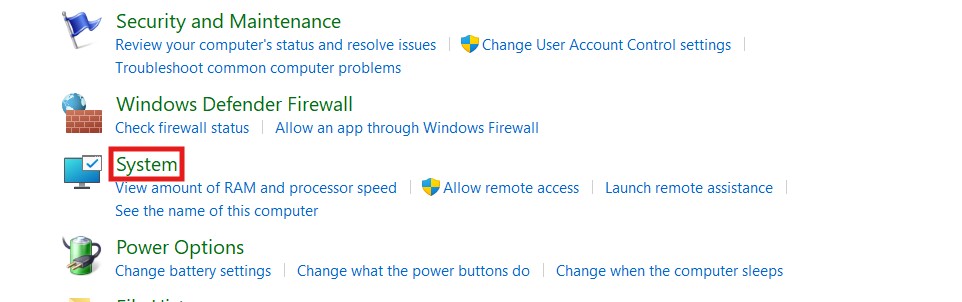
d). Then in the System option, you find Installed Memory (RAM), indicating how much RAM has been installed.

How to Check RAM in Laptop or PC (Mac Users)
For Mac users, it’s just as easy, but you have to go about it in a slightly different way. so this is how to do it on a Mac:
1. Using About This Mac
To see your RAM on a Mac, so here’s what to do:
a). Click the Apple logo in the top left corner of your screen.
b). Then select About This Mac from the dropdown menu.
c). Then in the window that opens, you’ll see an overview of your system. Under the Overview tab, you’ll find details about your RAM under Memory.
This method provides a straightforward way to check your RAM and other system information.
2. Using Activity Monitor
If you prefer to see more of the detail of your RAM usage, you can utilize the Activity Monitor:
a). Go to the Applications folder, then Utilities and choose Activity Monitor.
b). In the Activity Monitor, press the Memory tab at the top.
c). Then you will be able to view the memory use of your system and which programs are consuming the most RAM.
So, this technique is excellent for monitoring how your RAM is being used in real time.
How Much RAM Do You Need?
Now that you know how to monitor RAM in your laptop or computer, the natural follow-up question is, how much RAM do you require? The quantity of RAM you require will vary based on your particular use scenario. So here’s a simple rule of thumb:
1. Light Tasks (Web browsing, Office applications): 4GB to 8GB of RAM will be enough for light use.
2. Multitasking (Running several programs): 8GB to 16GB of RAM is best for users who multitask most of the time or handle large documents and several applications.
3. Gaming and Heavy Tasks (Video editing, 3D rendering): 16GB to 32GB of RAM will be best for heavy usage.
4. Career and Creative Projects (Heavy video editing, large data processing): Professional work may require 32GB or more of RAM for career work, particularly for big files and heavy-duty applications.
Upgrading RAM
If your system’s RAM is not enough to meet your demands, upgrading your RAM is a cheap way out. Before you undertake an upgrade, it’s vital to verify the following:
1. Compatibility: Ensure that your laptop or PC supports additional RAM and check the type of RAM compatible with your device (e.g., DDR3, DDR4).
2. Slots: Verify how many RAM slots your device has. Some laptops have one or two, while others may have more.
3. Capacity: Check your system’s maximum RAM capacity. so this information can typically be found in your device’s manual or on the manufacturer’s website.
Once you know this information, you can buy the appropriate RAM modules and do the job yourself or find professionals to do it for you.
Also, check the article by clicking here on how to speed up laptop or PC, this will be helpful to upgrade the ram.
How to check ram in laptop or PC
Having the ability how to check RAM in laptop or PC is a basic skill for ensuring your computer’s performance. Whether you’re addressing sluggish speeds or preparing an upgrade, the steps outlined above will enable you to better know your system’s memory. So, by keeping a check on your RAM usage on a regular basis, you can make sure that your system is running smoothly and efficiently, avoiding slowdowns in the future. If you realize that your computer’s RAM is insufficient, upgrading it is a good way to improve performance, particularly for heavy users who expect more from their machines.
This is a complete detailed article on how to check RAM in laptop or PC, I hope this article is helpful for you. If you like it, please share it, and if this information is helpful for you, so please comment and keep checking the website. You will get such informative articles in the future, so stay updated on this website you will get the best content.
Thank you for giving your valuable time……………